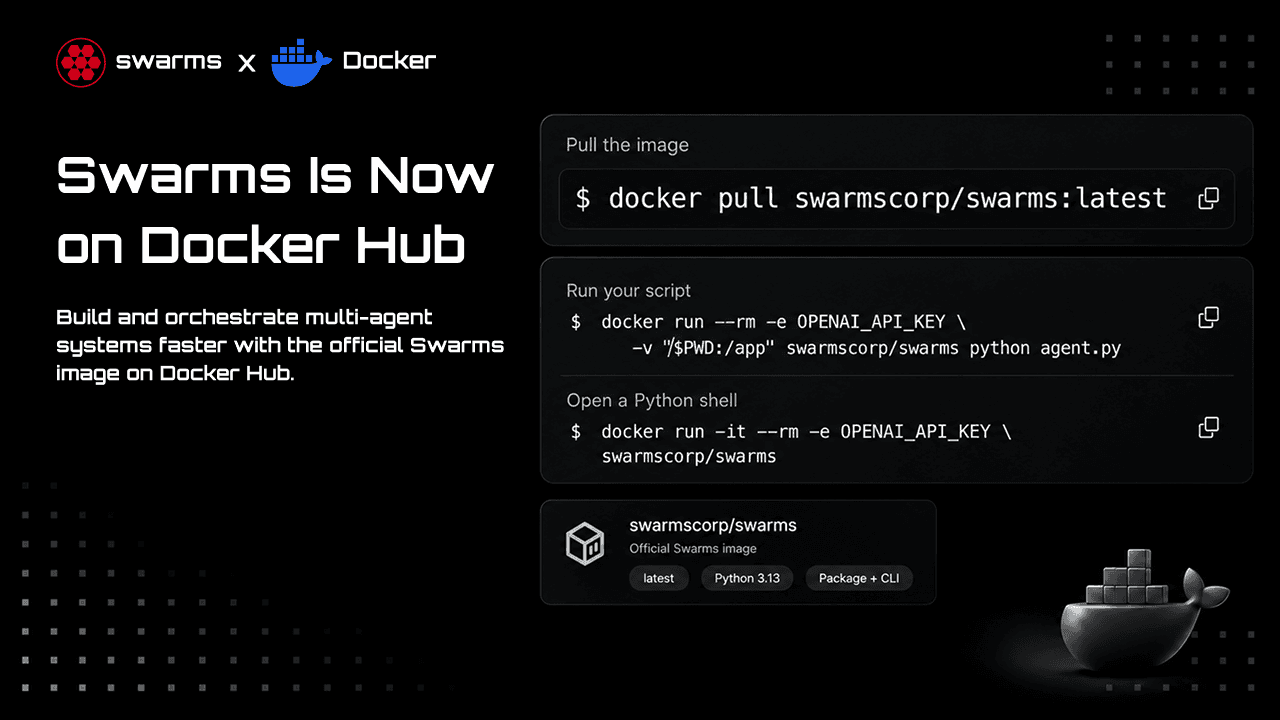
Swarms 现在有了官方 Docker 镜像。Docker Hub 上的 swarmscorp/swarms 预装了 Python 3.13、swarms 包和 swarms CLI,同时支持 linux/amd64 和 linux/arm64。只要机器上装了 Docker,一条命令就能运行智能体,不需要配置本地 Python、虚拟环境,也不会有依赖冲突。
本文介绍镜像里有什么,以及如何上手:运行第一个智能体、安全地传入 API key、给智能体加工具、运行多智能体工作流、使用 CLI、Docker Compose,以及把自己的智能体打包成镜像。下面的每条命令在发布前都已在已发布的镜像上运行过。
镜像里有什么
- Python 3.13,swarms 安装在独立环境
/opt/venv 中,由 uv 直接从 swarms 源码构建。
swarms CLI,已加入 PATH,开箱即用。- 非 root 用户。 容器以
swarms 用户(uid 1000)运行,工作目录是 /app。
- 默认命令是 Python。
docker run -it swarmscorp/swarms 会打开一个可以直接导入 swarms 的 Python shell。
- 两种架构。 同一个标签可在 Intel、AMD 机器以及 Apple Silicon 等 ARM 机器上运行。
标签
| 标签 | 基础镜像 | 压缩后大小 | 适用场景 |
|---|
latest | Debian slim,Python 3.13 | 约 112 MB | 试用和跟着本文操作 |
16.0.1 | 与 latest 相同 | 约 112 MB | 在生产环境中固定版本 |
16.0.1-alpine | Alpine,Python 3.13 | 约 95 MB | 更小的镜像、更少的已知漏洞 |
latest 会随新版本更新。在生产环境中请固定一个版本标签,这样新版本发布时你的容器不会在你不知情的情况下发生变化。Alpine 版本更小,Docker Scout 对它报告 22 项发现,而 Debian 版本是 57 项。这 22 项全部来自一个 Python 依赖(litellm),操作系统包中没有。
快速开始
拉取镜像:
docker pull swarmscorp/swarms:latest
确认 CLI 可用:
docker run --rm swarmscorp/swarms swarms --help
打开一个装好 swarms 的 Python shell,并从当前 shell 传入你的 OpenAI key:
docker run -it --rm -e OPENAI_API_KEY swarmscorp/swarms
>>> from swarms import Agent
>>> agent = Agent(model_name="gpt-5.4-mini", max_loops=1)
>>> agent.run("Say hi in three words")
-e OPENAI_API_KEY 不带值时,会把当前 shell 中的同名变量复制进容器,key 不会出现在命令历史里。LiteLLM 支持的任何服务商都可以这样使用:传入 ANTHROPIC_API_KEY、GROQ_API_KEY、GEMINI_API_KEY 等即可。
运行第一个智能体
在一个空文件夹中创建 agent.py:
from swarms import Agent

agent = Agent(
    agent_name="Docker-Analyst",
    model_name="gpt-5.4-mini",
    max_loops=1,
)

print(agent.run("In three short bullet points, why run AI agents in containers?"))
在该文件夹中运行:
docker run --rm -e OPENAI_API_KEY -v "$PWD:/app" swarmscorp/swarms python agent.py
-v "$PWD:/app" 把当前文件夹挂载到容器的工作目录 /app。容器能看到你的脚本,智能体写出的文件也会回到你的文件夹里。运行结束后,agent.py 旁边会出现一个 agent_workspace/ 文件夹,里面是智能体的日志和保存的状态。如果想放到别处,设置 WORKSPACE_DIR,例如 -e WORKSPACE_DIR=/app/runs。
--rm 会在容器退出时删除容器,除了挂载文件夹里的文件,不会留下任何东西。
把 API key 放在 .env 文件里
使用多个服务商时,把 key 放进 .env 文件,然后整体传入:
docker run --rm --env-file .env -v "$PWD:/app" swarmscorp/swarms python agent.py
值不要加引号。docker run --env-file 会按原样读取每一行,所以 OPENAI_API_KEY="sk-..." 传进容器的 key 会带着引号,服务商会拒绝它。Docker Compose 的 env_file 会去掉引号,所以同一个文件在 Compose 中有没有引号都能用。
不要把 .env 文件复制进镜像,也不要把 key 写进 Dockerfile。任何拉取镜像的人都能读到它们。请像上面那样在容器启动时传入 key。
给智能体加工具
任何带 docstring 的 Python 函数都可以作为工具。下面这个工具报告智能体运行在哪里:
import platform

from swarms import Agent


def system_info() -> str:
    """Report the operating system and Python version this agent runs on.

    Returns:
        str: The platform and the Python version.
    """
    return f"{platform.platform()}, Python {platform.python_version()}"


agent = Agent(
    agent_name="Container-Inspector",
    model_name="gpt-5.4-mini",
    tools=[system_info],
    max_loops=2,
)

print(agent.run("Which operating system and Python version are you running on?"))
docker run --rm -e OPENAI_API_KEY -v "$PWD:/app" swarmscorp/swarms python tools_agent.py
智能体会调用 system_info,回答的是容器内的 Linux 内核和 Python 3.13,与宿主机是什么系统无关。工具在容器内运行,所以一个会写文件或执行命令的工具只能接触到你挂载的文件夹。
运行多智能体工作流
所有 swarms 结构都能在镜像中运行。下面让一个研究员和一个写作者依次执行:
from swarms import Agent, SequentialWorkflow

researcher = Agent(
    agent_name="Researcher",
    system_prompt="List the key facts about the topic, briefly.",
    model_name="gpt-5.4-mini",
    max_loops=1,
)
writer = Agent(
    agent_name="Writer",
    system_prompt="Turn the facts you are given into one clear paragraph.",
    model_name="gpt-5.4-mini",
    max_loops=1,
)

pipeline = SequentialWorkflow(
    agents=[researcher, writer],
    max_loops=1,
    output_type="final",
)
print(pipeline.run("Multi-stage Docker builds"))
docker run --rm -e OPENAI_API_KEY -v "$PWD:/app" swarmscorp/swarms python workflow.py
把 SequentialWorkflow 换成 ConcurrentWorkflow、MixtureOfAgents、HierarchicalSwarm、GraphWorkflow 或其他任何结构,命令保持不变。
不写 Python,直接用 CLI
镜像中装好了 swarms CLI,可以直接在命令行运行智能体:
docker run --rm -e OPENAI_API_KEY swarmscorp/swarms \
  swarms agent \
  --name "Explainer" \
  --description "Explains things simply" \
  --system-prompt "You explain technical ideas in plain language." \
  --task "What is a container image? One sentence." \
  --model-name gpt-5.4-mini \
  --max-loops 1 \
  --no-interactive
也可以用 YAML 描述整个 swarm。把下面的内容保存为 agents.yaml:
agents:
  - agent_name: "Researcher"
    model:
      model_name: "gpt-5.4-mini"
    system_prompt: "List the key facts about the topic, briefly."
    max_loops: 1

  - agent_name: "Writer"
    model:
      model_name: "gpt-5.4-mini"
    system_prompt: "Turn the facts you are given into one clear paragraph."
    max_loops: 1

swarm_architecture:
  name: "Research-Pipeline"
  description: "A researcher gathers facts and a writer turns them into prose"
  swarm_type: "SequentialWorkflow"
  max_loops: 1
  task: "Explain Docker volumes"
然后运行:
docker run --rm -e OPENAI_API_KEY -v "$PWD:/app" swarmscorp/swarms \
  swarms run-agents --yaml-file agents.yaml
run-agents 需要 swarm_architecture 部分,它决定智能体如何协作以及要执行的任务。swarms heavy-swarm、swarms llm-council、swarms autoswarm 等其他 CLI 命令用法相同。在容器中运行 swarms --help 可查看完整列表。
Docker Compose
对于经常运行的项目,把配置写进 compose.yaml:
services:
  agent:
    image: swarmscorp/swarms:16.0.1
    env_file: .env
    volumes:
      - .:/app
    command: python agent.py
docker compose run --rm agent
Compose 会从 .env 读取 key、挂载项目文件夹,并把镜像固定到一个版本,团队里每个人运行的都是同一版本。
把自己的智能体打包成镜像
要发布一个智能体,可以基于 swarmscorp/swarms 构建镜像,加入你的代码和工具需要的额外依赖:
FROM swarmscorp/swarms:16.0.1

USER root
RUN --mount=from=ghcr.io/astral-sh/uv:0.12.23,source=/uv,target=/bin/uv \
    uv pip install --python /opt/venv/bin/python --no-cache yfinance
USER swarms

COPY --chown=swarms:swarms agent.py .
CMD ["python", "agent.py"]
docker build -t my-agent .
docker run --rm -e OPENAI_API_KEY my-agent
有几个细节需要注意:
- 用 uv 安装。
/opt/venv 中的 swarms 环境没有 pip,这样镜像更小。--mount 那一行只在这一步提供 uv,不会把它留在你的镜像里。
- 用 root 安装,用
swarms 运行。 /opt/venv 属于 root,所以安装步骤切换到 root,下一行再切回来。容器运行时依然不是 root。
- 只复制你的代码。 用
.dockerignore 把 .env 和其他密钥排除在构建之外。
最终得到一个镜像,可以在服务器、定时任务、Kubernetes 或 CI 中运行,智能体、工具和依赖都在里面。
从源码构建镜像
Dockerfile 位于 swarms 仓库 的根目录,可以从任意提交构建镜像:
git clone https://github.com/kyegomez/swarms.git
cd swarms
docker build -t swarms .
它从你检出的代码安装 swarms,所以本地修改会进入镜像。构建只会收到 pyproject.toml、README.md 和 swarms/ 包,.env 文件和 .git 永远不会进入构建。要构建其他 Python 版本,传入构建参数:
docker build --build-arg PYTHON_VERSION=3.12 -t swarms:py312 .
要同时构建两种架构并推送到你自己的镜像仓库,使用 Buildx:
docker buildx build --platform linux/amd64,linux/arm64 -t <your-registry>/swarms:dev --push .
常见问题
- 横幅显示 "No API key found"。 容器里没有服务商 key。用
-e OPENAI_API_KEY 或 --env-file .env 传入,并在容器中运行 swarms setup-check 确认。
- 本地能用的 key 被服务商拒绝。 使用
docker run --env-file 时,检查 .env 中的值是否带了引号。
- 在 Linux 上写入挂载文件夹时提示 "Permission denied"。 容器以 uid 1000 运行。如果你的用户 uid 不同,在
docker run 中加上 --user "$(id -u):$(id -g)"。macOS 和 Windows 上的 Docker Desktop 会自动处理。
swarms upgrade 不会更新镜像。 容器是重新构建的,而不是原地升级。请拉取更新的标签:docker pull swarmscorp/swarms:latest。- 出现平台不匹配的警告。 Docker 会自动选择正确的架构。如果看到这个警告,说明本地缓存的是旧的单架构版本,再运行一次
docker pull swarmscorp/swarms:latest 即可。
仓库中的变化
镜像由 swarms 仓库根目录下新的 Dockerfile 构建(#2509、#2510)。它替换了已经无法构建的旧 scripts/docker/ 配置。新的构建分两个阶段,用 uv 完成,只把构建好的 Python 环境复制进最终镜像。同一改动还从 swarms 中移除了未使用的 setuptools 依赖,README 也加入了镜像的说明。
下一步
- 从 Docker Hub 拉取镜像。
- 在 swarms 仓库 中阅读 README,了解镜像能运行的所有结构。
- 在 Overclock 发布说明 中查看 Swarms 16 的更新内容。